|
Repeater Operators Guide |
Two byte identifiers are here!Meshcore firmware versions 1.14.1 and later support two-byte identifiers. This means there can be up to 65,534 unique identifiers instead of the original 254. This only immediately affects those of us running repeaters. The network will still function as usual as repeaters are upgraded. Repeaters should be upgraded and configured ASAP.Companion units should be upgraded to firmware version 1.14.1 or later as soon as practical but not reconfigured to use two-byte identifiers until all repeaters are reconfigured. We will get the word to switch companion units to the two-byte identifier when all repeaters have been reconfigured (still pending as of 17-September). |
Types of Repeaters
There are basically two types of repeaters: community repeaters and personal repeaters. However, distinction between the two is not concrete.
Personal repeater:
Let's say you cannot reach a repeater from inside your house or from most places inside your house. However, you can reach a repeater outdoors or on an upper floor or at a specific window. This is when you need a personal repeater. Your choices are:
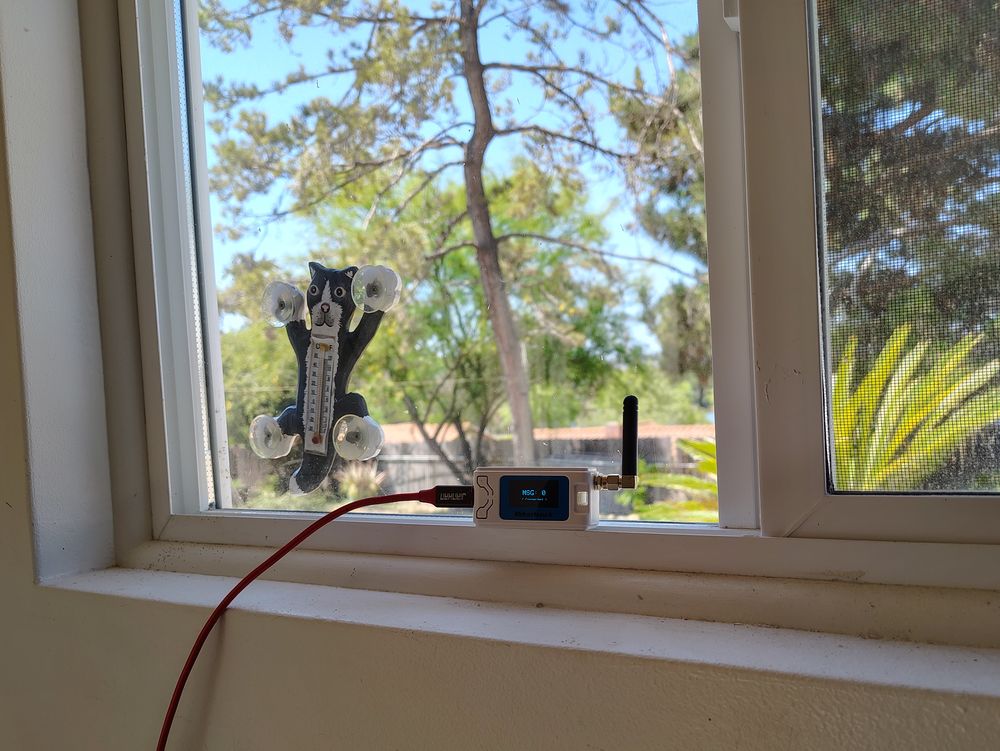
1. A companion unit programmed as a repeater. This is the least expensive option.
 |
|
|
If you can ealily reach a community repeater with companion unit in a particular window, this may be your best option. However, you should consider adding a larger battery or be prepared to connect a power bank in case of an extended power failure.
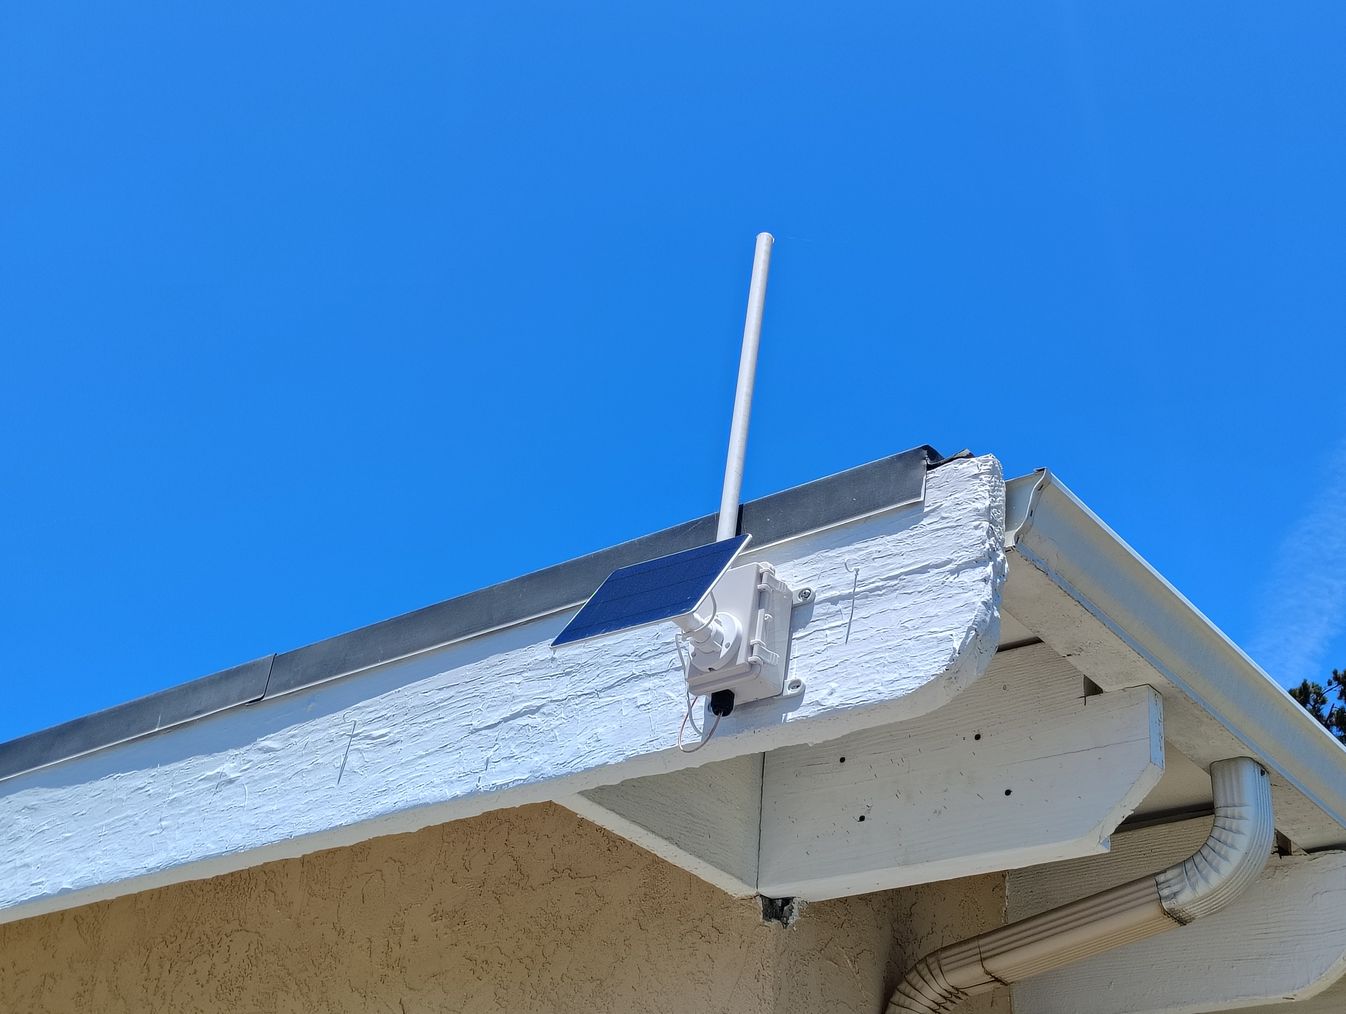
2. A solar-powered rooftop repeater (see image below). This is a personal repeater in name only. You will be providing improved access to anyone who has line of sight with your repeater. You may want to do this if you need your personal repeater higher to reach a community repeater. Then, you are hosting another community repeater, improving the connection for other people in your area.
Rooftop solar repeater:
You have line of sight access to other repeaters and you want to help improve the overall mesh.
You can buy ready-built repeaters for as little as $100 or you can build your own.(I will upload my design soon).
 |
|
|
Please coordinate with the West Coast Mesh community
Before you decide to configure and maintain your own repeater you should be willing coordinate with the West Coast Mesh community. This is not absolutely required, but cooperating will ensure you you don't cause technical problems with this well-established community that we are part of. To coordinate with the community you will need a Discord account. (You can contact me for help if necessary.)
1. Create a Discord account
If you don't have a Discord account go to https://discord.com/app to create one (follow the prompts there). Discord has a phone app if you prefer to use it on your phone. Install the app and follow the prompts there to create an account.
2. Join the West Coast Mesh Discord server
-
On the Discord home page click the discord logo
in the upper left
 .
.
- You should see an option to Add a Friend at the top of the screen.
- Type West Coast Mesh in the text box and click the Send Friend Request button.
- You should get an automated acceptance immediately.
Firmware installation and setup
3. Complete steps 1 - 3 of the Getting Started procedure
4. Connect Your Device
 |
|
|
- Plug your device into your computer using a data-capable USB cable.
- On the Meshcore flashing page, select Repeater.
- Look at the Version box and be sure you are installing latest version of the firmware.
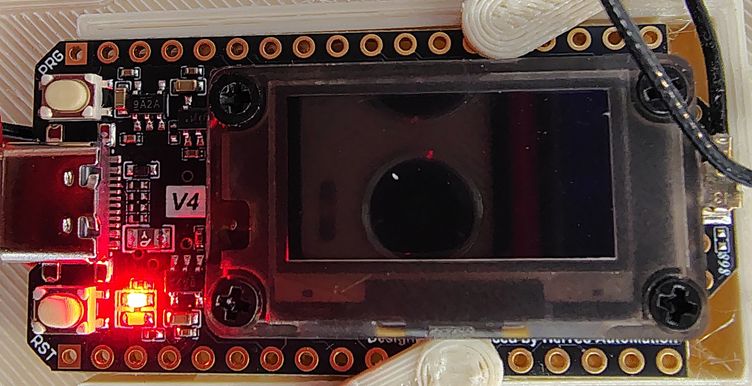
- Put your device into flash mode
- Press and hold the PRG button (see illustration above) then press the RST button.
- Click the Flash button.
- A popup will appear showing available serial ports.
- Select the port labeled CP210x, USB to UART Bridge Controller (COMx) - paired
- If you don't see the above controller, it may appear with a different name. It is likely that the CP210x is the only COM port on your computer so try whatever appears in lieu of the above.
- You may see multiple COM ports. If one of them is not labeled CP210x, USB to UART Bridge Controller (COMx), you will need to try each one until you find the one that works.
- If no COM port appears:
- Reinstall the CP210x driver
- Try a different USB cable
- Try a different USB port
-
Click Connect.
5. Flash the Firmware
- After clicking Connect, the firmware will install, taking about one minute
- When complete, the process ends with the message Hard resetting via RTS pin...
- Click Continue.
- Manually reaboot the device by pressing the reset button.
- The first boot takes about one minute. Subsequent reboots take a few seconds.
6. Configure your device for the West Coast Mesh community.
- Click Configure via USB.
- Follow the on-screen instructions to reboot and reconnect to your device.
- You may need to press the Reset button on your device (lower left button when looking at the screen).
- Click Connect.
- A popup will appear showing available serial ports.
- Select the port labeled CP210x, USB to UART
Bridge Controller (COMx) - paired
- If you don't see the above controller, it may appear with a different name. It is likely that the CP210x is the only COM port on your computer so try whatever appears in lieu of the above.
- Click Connect.
7. Set up the repeater
- Give your repeater a name (use your imagination).
- Zoom in on the map and select a location for your repeater.
- Radio Settings:
- Select Custom
- Frequency: 927.875
- Bandwidth: 62.5.
- Spreading Factor: 7.
- Coding Rate: 5 or greater.
- A higher coding rate improves error correction at the cost of slower data throughput.
- TX Power: 30 dBm.
- A TX Power of 30 dBm should give you the maximum power for your unit. For the Heltec v3 that is 22 dBm (159 mW). For the Heltec v4 that is 28 dBm (631 mW).
- The configuration interface may balk at setting your TX Power higher than your unit is capable of (it seems to be fixed now). If so, set it as above for your unit.
- Advertising:
- The West Coast Mesh community has suggested setting the Flood Advert Interval to 24 hours, but this is not mandatory.
- Access Control:
- Set an Admin Password, but don't forget it.
- Advanced Settings:
- Path Hash Mode:
- 2-byte (1).
- Path Hash Mode:
- Save Settings.
Your repeater is now up and running.
Operating your repeater
Place your repeater where it has line-of-sight access to one or more other repeaters.
Remote administration
- Connect your phone to your companion unit
- From your companion unit you can ping (send an echo request) to any
repeater. This will determine if your repeater is reachable from
your current location
- You can only ping repeater that are in direct range of your companion.
- You can connect to a repeater for maintenance through other repeaters, but this is not as stable as a direct connection.
- From your companion unit you can ping (send an echo request) to any
repeater. This will determine if your repeater is reachable from
your current location
- Connect to your repeater
- Select your repeater from the contact list
- Click the gear icon (Manage)
- You will have a 10-second countdown after which you can press the continue button (you can eliminate the countdown by purchasing the Meshcore app).
- Type the Admin password into the provided box and click the login
button.
- Long press the Log in button to change the way you connect to your
repeater
- Direct -- your companion is in range of your repeater with no hops
- Flood -- you need to go through one or more other repeaters to reach your repeater
- Log in (or last path) -- uses the last path used to log in
- Long press the Log in button to change the way you connect to your
repeater
You have several options when connected to your repeater which will be discussed at a later date. For now the most important functions are to:
| Send an advert | Send an advert from your repeater |
| View zero hop neighbors | See which repeaters your repeater has seen adverts from (eight maximum). It may take several hours for this to be populated. |
| Sync Clock* | Synchronize the repeater clock with the phone clock. |
| Check status | this includes the battery charge state, which is useful for solar-powered repeaters. |
| Change the radio settings | If you need to change the radio settings after initial setup. |
| Change the reported location of the repeater. | Tell the repeater what map position to report. I usually set it at the nearest road intersection instead of its precise location. |
* If the repeater clock gets ahead of the real time (a common problem) you must reset the clock before synching.
- Go to the CLI (middle navigation button) and type clkreboot.
- Close the admistration panel and reconnect to the repeater.
- Return to the CLI and type clock sync .
Updating repeater firmware
Updating the repeater firmware can usually be done via WiFi without physically connecting to the repeater. I will give detailed instructions soon, but here is the general procedure:
- Go to the web flasher at meshcore.io.
- Select your repeater hardware
- On the flasher page
- Find the Download button and download the non-merged firmware file. Store this file where you can find it on your phone.
- Go near the repeater so you can connect with your phone via WiFi.
- Connect to the repeater as described under Remote administration.
- Open the CLI (middle navigation button).
- Type start ota.
- The repeater will start the over-the-air update procedure and will display an IP address.
- Find the repeater's WiFi network in the WiFi settings on your phone. It should be MeshCore-xxxx (xxxx is an identifier number).
- Connect your phone to the WiFi network.
- Open your web browser and type http://192.168.4.1/update (change the IP address if the repeater displayed a different address when you started the OTA update process).
- Choose the firmware file you downloaded earlier.
- Disconnect when the process is finished.
Updating from meshcore.co.uk firmware to the official meshcore.io firmware
You must do a complete erase and reinstall of the firmware as described above. You can preserve your repeater's identity by exporting and importing the configuration. However, to be safe and certain you are fully switched to the official Meshcore firmware you will want to copy your private key from one export file to the other.
- Before updating the firmware, connect to the repeater using the Configure via USB option.
- Use the Export button to save the repeater configuration.
- Find the exported JSON file, which should be in your downloads folder
- Open the JSON file in Notepad.
- Find and highlight the private key in the JSON file (you can't miss it).
- Copy the private key to the computer clipboard using Ctrl-C.
- Delete the JSON file (you may want to open a new Notepad file to save the private key, just in case).
- Install the firmware using the normal procedure.
- Connect to the repeater using the Configure via USB option.
- Export the configuration again.
- Open the new JSON file in Notepad.
- Find and highlight the private key.
- Paste the original private key over new privatge key and save the
file.
- If you are comfortable with editing text-based configuration files, you can edit the configuration (name, radio settings, etc.) here instead of using the regular UI.
- Return to the configuration window and use the Import button to import
the new JSON file.
- You may need to find the file again, which should be in your downloads folder.
- Reconfigure the repeater settings (name, radio settings, etc.) if you did not do so in the JSON file.