|
Getting Started |
Getting Started
*Lora, and thus Meshcore requires no license.
I sell ready-to-go Meshcore companions and repeaters at my cost.*The following is for people who want to do it themselves. |
Meshcore Firmware Installation Guide (ESP32 / Heltec V3, V4)
1. Assemble the LoRa unit
IMPORTANT: A necessasry modification to the companion unit enclosere.
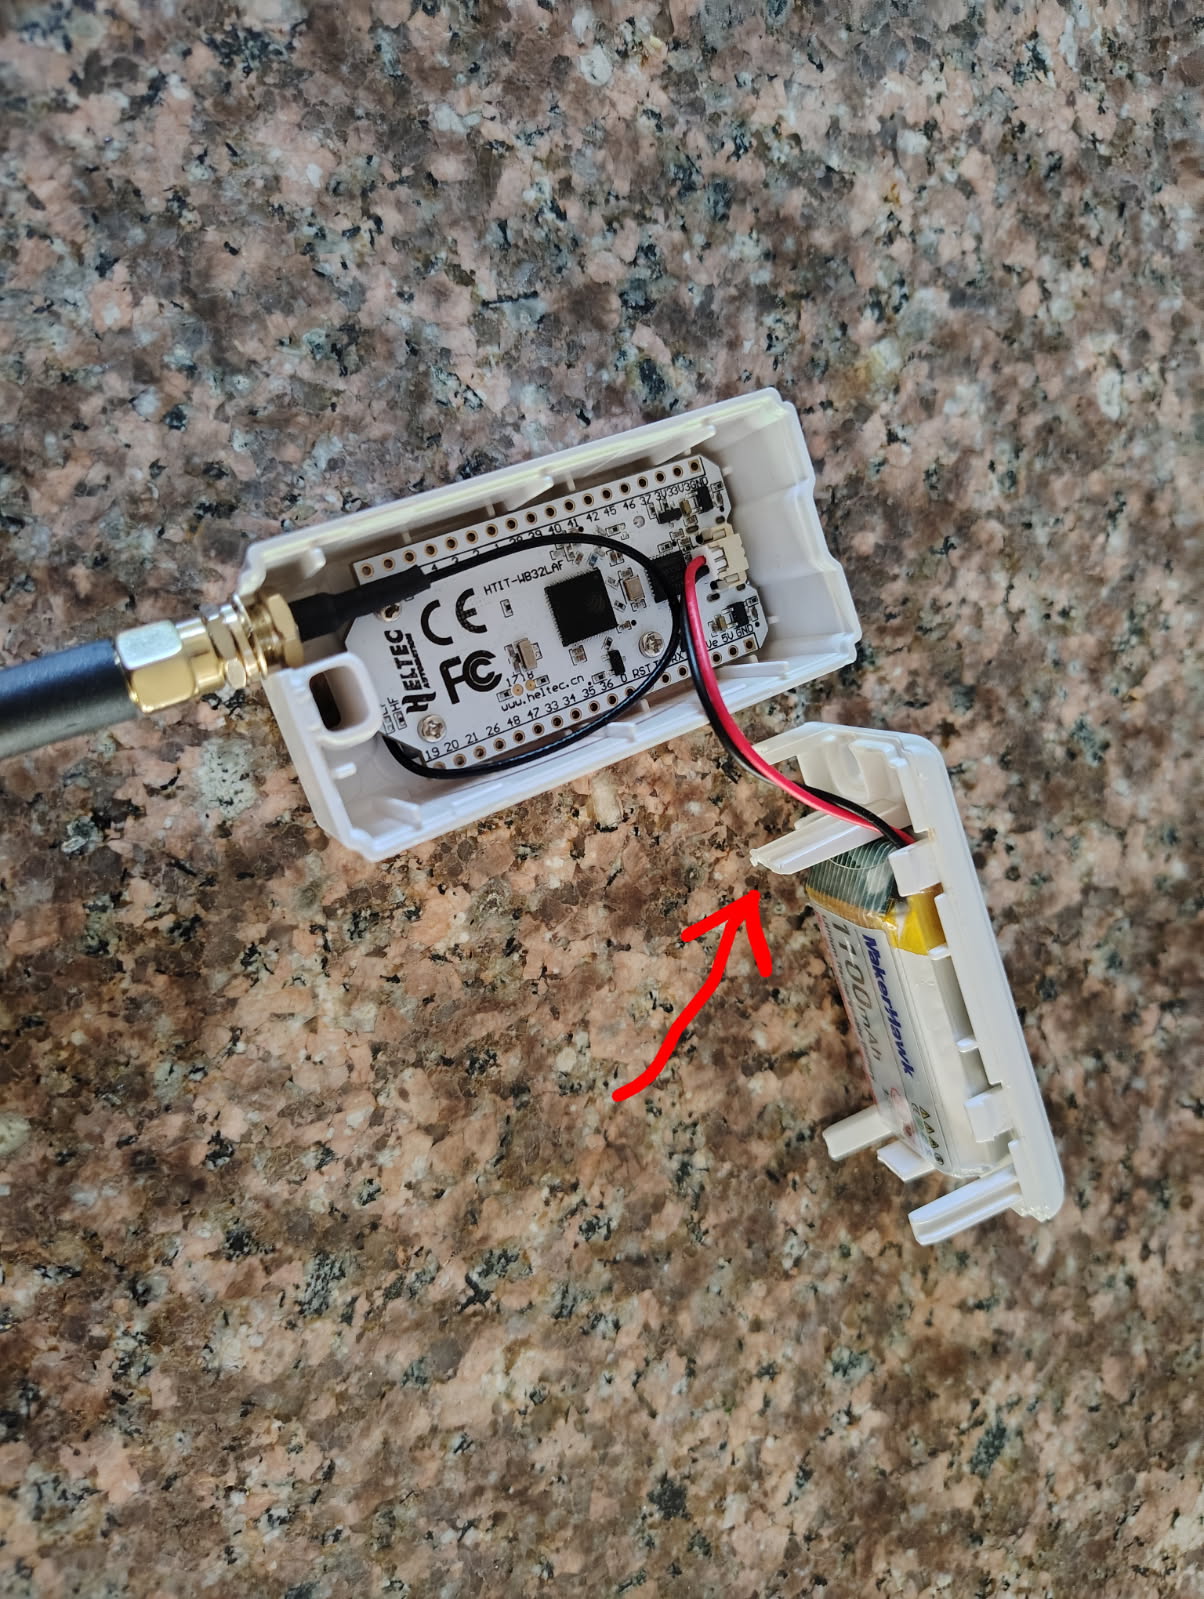
I’ve received reports—and experienced it myself—where the recommended companion unit gets stuck in a repeating “Loading” boot loop. This behavior is expected when the battery is low, but in these cases it happens even with a fully charged battery and even when powered through USB. In my units, the problem disappeared as soon as the circuit board was removed from the enclosure, and returned immediately when the board was placed back inside. The enclosure appears to be putting bending stress on the PCB. After some time with the normal heat of operation, something on the board fails under that stress, likely microcracks or weakened solder joints (some people report the problem is with the battery connector, but I have been unable to confirm this). I was able to restore normal operation, even with the board inside the enclosure, by trimming about 1/16 inch off the tab shown in the illustration below.
 |
|
|
I have made it standard procedure to shorten this tab before assembly of the unit. I highly recommend that everyone do the same.
- Your LoRa unit may come unassembled. They usually snap together.
- To make assembly easier:
- Bend the battery wires away from the walls of the enclosure to keep them from interfering with the halves of the enclusure when you snap them together.
- Route the antenna wire likewise.
- The antenna connector can be bolted in place before final assembly. Carefully slide the tab that makes part of the antenna conector opening under the lock washer.
- Operating without an antenna may damage the
unit.
- This is unlikely at the power level used by the companion unit, but to be safe, be sure to connect the antenna before applying power.
2. Install the CP210 VCP Driver on your computer
Many ESP32 boards use a Silicon Labs CP210x USB-to-UART chip for communication. Without the driver, your computer may not recognize the board.
Windows:
- Go to Silicon Labs CP210 VCP Drivers.
- Download the latest Windows VCP driver.
- Run the installer and follow prompts.
- After installation, plug in your Heltec ESP32 board.
- Open Device Manager → expand Ports (COM & LPT).
- You should see Silicon Labs CP210x USB to UART
Bridge (COMx).
- The above hardware will not appear unless the LoRa device is plugged in to the USB port.
- The x CP210 and the x after COM will be a number that may differ depending on the driver version and your computer configuration. For example, the driver may appear as CP1202, and the serial port as COM4.
- Note the COM port number, you will need it later.
MacOS:
- Download the Mac VCP driver from the same Silicon Labs page.
- Install the package.
- Plug in your Heltec ESP32 board.
- Run ls /dev/cu.* in Terminal—you should see a device like /dev/cu.SLAB_USBtoUART.
Linux:
- Most modern distributions already include CP210 drivers.
- Plug in your Heltec ESP32 board and run dmesg | grep ttyUSB to confirm detection.
3. Open the Meshcore Web Flasher
- Make sure you are using a supported browser.
- You must use
- Chrome
- Edge
- Brave
- Firefox and Safari do not support web flashing.
- Go to meshcore.io (the official Meshcore site).
- Select Flasher.
- Select your hardware.
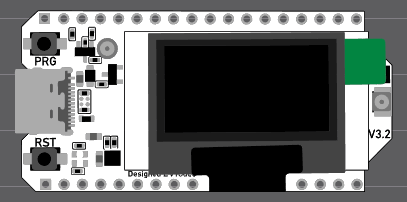
- My suggested hardware is based on the Heltec ESP32 v3. If you are using that, choose Heltec v3
 |
|
|
4. Connect Your Device
- Plug your device into your computer using a data-capable USB cable.
- On the Meshcore flashing page, select Companion Bluetooth.
- Look at the Version box and be sure you are installing latest version of the firmware.
- Click the Flash button.
- A popup will appear showing available serial ports.
- Select the port labeled CP210x, USB to UART Bridge Controller (COMx) - paired
- If you don't see the above controller, it may appear with a different name. It is likely that the CP210x is the only COM port on your computer so try whatever appears in lieu of the above.
- You may see multiple COM ports. If one of them is not labeled CP210x, USB to UART Bridge Controller (COMx), you will need to try each one until you find the one that works.
- If no COM port appears:
- Reinstall the CP210x driver
- Try a different USB cable
- Try a different USB port
-
Click Connect.
5. Flash the Firmware
- After clicking Connect, the firmware will install, taking about one minute
- When complete, the process ends with the message Flash Complete!
- Click Continue.
6. Pair With Your Phone
- Open the Meshcore app on your phone.
- Turn on Bluetooth.
- Power the ESP32 by pressing the reset button (the reset button is to the lower left of the device screen. The device may reboot automatically after flashing).
- Look for your device in the bluetooth devices. I should be called Meshcore xxxxxxxx (a random hexadecimal number).
- Look on your device screen for a Bluetooth passkey. If the screen is blank, press the option button (the option button is to the upper left of the device screen).
- Pair your phone to the device.
- Once paired you should see the Contacts screen in the Meshcore app showing No Contacts (you will see contacts soon).
7. Configure your device for the West Coast Mesh community.
- Press the gear icon in the upper right corner of the screen
- Find the Choose Preset button
- Select USA - Southern California
To manually set the radio use the following:
Frequency: 927.875 MHz
Bandwidth: 62.5 kHz
Spreading Factor: 7
Coding Rate: 5
- Click the Gear icon and on the Settings screen scroll down to Network Settings
- Click the Default Path Hash Size and change it to 1-byte (max 64
hops)
- You may leave this at the default, but not all repeaters can relay messages using a two or three byte path hash.
- You will probably want to change the name of your companion device. This is the first option on the Settings screen.
- Press the white on black checkmark at the top
right of the screen to save changes.
Set up the private SDES private channel
- Go to the web page that has the SDES channel QR code.
- Contact me or another participant to get the URL for the page.
- You may also scan the QR code from another participant's screen.
- A printed QR code may be available from another participant.
- Press the three dots in the upper right of the screen.
- Press Add Channel
- Press Scan a QR Code and scan the QR code.
8. Test Connectivity
-
First, send an advert to
announce your presence on the mesh.
- Press the radio icon
 at the top of
the screen then press Advert - Flood Routed
at the top of
the screen then press Advert - Flood Routed
- You may need to do this occasionally.
- Press the radio icon
-
Try sending a hello message on
the Public channel and see if anyone replies.
-
If you plan to do multiple tests, add the
#test channel.
- Press the three dots
- Press Add Channel
- Press Join a Hashtag Channel
- Type test (all lower case)
- Press the Join Channel button
-
If you plan to do multiple tests, add the
#test channel.
-
Check if you can reach local repeaters.
- After sending a message, see if Repeats Heard appears under the message. .
- Move around your home or neighborhood to test range.
-
While on the #test channel, send the word, test or
just the letter T.
- There is a bot named MeshBud in Pasadena that monitors the mesh and responds to commands. MeshBud responds to the test command or the letter T with a list of repeaters your message went through to get to its location. To see the repeater names spelled out us the command path.
- If MeshBud fails to respond, or you are otherwise unsure if your
messages are getting out, go to the West Coast Mesh Discord and look for
live-mesh-feeds and click on #test
channel.
- Computers monitor several public channels and show them on the Discord server. Look here to see if your message reached the bot.